Home Wind Turbine

This is the place for all Off-Grid wind turbine issues and discussions. Customers meet each other, dealers and installers help out with questions.
Post Reply
admin
Site Admin
Posts: 1
Joined: Fri Feb 16, 2024 4:45 pm

About Turbine/Charge Controller Status Lights?

Post by admin »

>> Hello Samuel, We got the system running great without a hitch. It
>> was slow going because it's my first install but the posts I've read and
>> the manual information was good enough for my electrician and me to
>> figure it all out. I must say I am really pleased with the content I have
>> read on the forum posts here. I have been just browsing post after
>> post and have learned everything I need to know from you here. With
>> one exception. The Wind Solar Turbine/Charge Controller and how to
>> understand its status lights. That's what's missing.

>> So I am asking you to post some detail for me on that and clarify it for
>> me and I think you should add that to the manual contents. That's it,
>> please email me when you have time to answer this issue.

>> Thanks, Mike


Hello Mike,

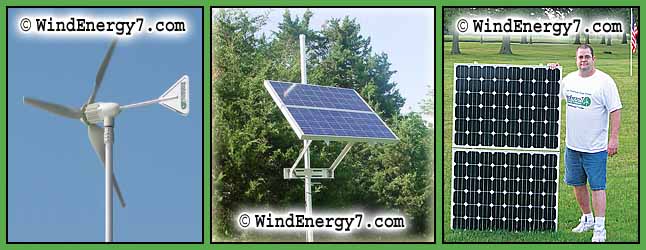
Wow, nice job on your install and you did that with hardly any phone support required, excellent job. Sorry I haven't had time to post your pictures yet, maybe next weekend I will have the time. OK, here's a picture of the wind Turbine/Charge Controller. Have a look to reacquaint yourself with what you are seeing. Then below the image I will comment about each status light from left to right.

Image

Image

On/Stop Switch:
This switch turns the turbine on/off and short circuits and stops the wind generator.

Battery Status Lights:
As you can sort of decipher from the icons, this light tells you when battery is charged, charging, and low. Green = Battery Full, Flashing Green = Battery Charging

Wind/Solar Indicator:
The small icon on the top indicates a flag in high wind, that's Wind, the little icon below is the Sun. So, Flashing Green = Wind Charging, Flashing Red = Sun Charging

Dump Load Status:
The small icon is for a heating element, this is the dump load. When your batteries are full, and the system begins to hit a level high enough to overcharge your batteries, this light will turn red. Red = Dump Load Releasing Heat, thus batteries are at full charge and you are charging more than you can store or use at this point.

If you have any additional questions about the Turbine/Charge Controller, just email me or post them up and I will answer them as soon as possible. I will also add this to the manual now and fine tune it later.

Anyone wanting a home turbine system, fill out the contact form and I can call you back and consult with you first. I can take credit card by phone to make it easier. There are still areas open for new dealers. So, if you are interested in becoming a dealer fill out the same form and we can see if your area may still be open. Territories are still open but being taken up from Hawaii to Massachusetts now and I have established two dealers in Canada.


Related Article Post:
Solar Panel Wiring and Turbine/Charge Controller Voltage


Twin Turbine Rooftop Wind Turbines, Michigan
Illinois One Turbine Wind/Solar Hybrid With Tower
Oklahoma Install, One Turbine Wind Only Rooftop Wind Turbine
Small Wind Turbine Kit, Installed in Oklahoma
Rooftop Wind Turbine Kit Install, Indiana
.
--
turbineZ
admin
Site Admin
Posts: 1
Joined: Fri Feb 16, 2024 4:45 pm

Wiring Questions for Single Turbine, On Budget..

Post by admin »

>> Like he says that we should put the lights and television on the system
>> since we are only starting with 4 batteries , do you agree with this ?
>> We don't want to over load the system and if we did how
>> would we know?

Yes, that's a reasonable load for the system to start out, especially with 4 batteries and a single turbine. You will add loads later as you get smoothed out and know your system better. I will help you figure out how to judge your capacity and add stuff later.

Does the turbine and the solar panels go into the same system or do you have to hook up different different breakers to each item , such as the turbine and a solar panel to the Tv and the other panel to the lights ? I hope that what I just said makes sense? Or does it all just go into one?

Image

The Turbine and solar connect to the controller, together.

The Controller connects to the batteries.

The Batteries connect to the inverter.

The Inverter serves your 120v AC loads from a GREEN CIRCUIT.


The entire loads of the system you have can run on a single breaker of 20A (20 amp) 120v AC. Many folks use a 30a breaker.

The wiring is very flexible in that with the system you have, it does not take too much to wire it all up. However, you want to look at where you are going, maybe have some added beef for upgrading the system.

Personally, since you already made a decision to go with 4 batteries, it's a minimal system. So, here's what makes sense to do a nice job, but on a budget.

A 20a breaker from your Main panel. That to an outlet in your inverter cabinet. That's your 120v input for the inverter.

INTO the inverter, a 20a pigtail, in/out so you can have the inverter easy to swap and upgrade.

OUT OF the inverter a 20a line to a single 20a breaker, wired to your green circuit loads.

That is your minimum off-grid system and will handle up to 2 wind/solar kits and their loads.

Should you expand past that, you can add a beef up on breakers and wiring at that time. Keep in mind that many people run a new circuit wiring and thus, like behind a refrigerator they have 2 live outlets, on old one and a new, green one. This gives ability to take things off and on the green power as you evaluate the capacity you have.

Capacity is different for everyone based on site wind and solar resources and wiring configurations etc. With Off-Grid, he key will be watching and learning what the load can be and using all you can make without going over what you generate.
admin
Site Admin
Posts: 1
Joined: Fri Feb 16, 2024 4:45 pm

Mounting Solar Panels to Roof?

Post by admin »

>> Hi Sam
>> How should the panels be mounted? upright or sideways. Also, do I
>> use tar on the roof where I am going through with holes?

Hello Guy,

I tried to call back and left a message Saturday. I usually put the panels oriented so that the connections are top. It's OK if you go other way but this s standard and that fits with rails that run horizontally.

Are you putting them all on one roof face? Like all in a row? If so, you may want to put a rail down and then bolt them to the rail. That makes less holes through roof. So, a rail would go horizontal and panels would orient perpendicular, vertical onto the 2 rails. Some would also put a angle at the bottom edge. Then again, many folks just bolt the Z Clips right through the roof with 4 bolts per panel. For you I recommend a couple of rails because you can be sure they go INTO THE RAFETRS with longer lag bolts, like the turbines do. Then mount the panels to the rails with the Z clips, that's best way. For the rails you can use aluminum channel, square tubing, or Z Bar

And yes, you should dip the bolts in tar or hit them with a 25 year silicone as you put them in, that goes for roof mount turbine and panels, tar the bolts and holes a bit, or a 25 year silicone is used regularly because it's easier to apply than tar.

Here's a picture of a resent install showing rails and an angle at bottom. On a normal home roof would be a bit different as your rails would be atop spacers or blocking and bolted straight into a truss or rafter with a 3 1/2" galvanized lag. Usually aluminum is used because it won't rus and doesn't need paint or seal.

Image
.
admin
Site Admin
Posts: 1
Joined: Fri Feb 16, 2024 4:45 pm

Is Wind Still A Good Investment Even In A Wind Zone 1?

Post by admin »

>> If I live in an area where my wind maps show only a 1, can I still
>> utilize wind energy and would it even be a cost worthy investment?

Hi Lisa,

As a property improvement it will still be a great investment as it will no doubt provide emergency power and green the property. This one of the best property improvements you can have for value. In a wind zone 1 there are pockets of good wind and decent sites that will do well too. Many folks sites do not concur with these broad general maps ratings. But it would be best to think conservatively. Also, in Georgia you have good solar. So, the strategy would be to start a system, then analyse and most likely add to the solar to grow the system so that your balance would be primarily more solar than wind, but still to have wind in any home generation system is ideal.

Image

As a business, the systems are easy to sell and payback themselves in a very short period of time. At 12% on sale only, 5 turbines sold pays off your unit because the IRS tax credit pays for 30% off the top. The systems are a fun thing to do, the right thing to do, and yes, even in a zone 1 I think are a good investment.

As an investment for a fast money payback through energy generated, will pay itself off over time but starts to stretch into 12 to 15 year payback on power generated (ALONE). That's if you ignore the IRS, solar capability, income from systems sold, the property improvement, rising energy, and energy security for a family. If the focus is solely the power generated by the wind, yes, it's a longer payback than a zone 2 or better, but it still will get wind and make power.

But, I do believe power costs will double by time Obama leaves office. That will make that curve shorten for sure. Energy is just going to get more and more precious. Still, does a swimming pool, new deck, or other property improvement actually make money? This does, for 30 years and beyond.
admin
Site Admin
Posts: 1
Joined: Fri Feb 16, 2024 4:45 pm

Shelf capacity of Tennesco Units

Post by admin »

Yes, the 150 lb shelf capacity is an issue. But these batteries do spread load and much focussed right to edges in sides and back. What the photos do not show yet is the shelves are supported by extra 2x2 blocking underneath, screwed from sidewalls, and then a 2x4 across center and screwed with 3" screws from sides. There are many, many installs of this cabinet with different ways of supports for the shelves people have employed. The heavier Tennesco is so much more expensive and harder to get. With about $20 in lumber and screws this is no problem at all.

I must say though. After going through an install recently where an existing cabinet was used that did not have sufficient space. It made me appreciate how well the system design of using these cabinets works. How well it fits, looks, easy to work in and work with. Easy to repeat again and again on multiple sites and installs. This actually one of the best things we do with a system is make it so tidy and orderly looking.

I really discourage using closets, and existing cabinets. If you do that, measure the batteries and plan carefully to be sure it is all going to fit appropriately. It's a total drag on an install to be playing with a cabinet that isn't correct or spending as much time building a cabinet as it takes to put in a system. I understand working in a budget and having to do what you can afford. So, people in that situation I totally get it. My first battery bank was nowhere near this nice and well designed.

Image

This standard method we use is well thought out. This looks good, works good, is easier than almost any other thing you can do. So, as a dealer, this model is efficient and cost effective, best to deploy and demonstrate for others.

A wooden battery box on floor like clayhill mentioned is a common method I have seen allot for solar installs. This cabinet though as a demo example is preferred and recommended as it makes a great presentation and function and is better for our branding of WE7 systems. This is a much better method and design than what others are doing out there. I want to encourage continuity as much as possible with systems being deployed.

I'm trying to get my latest pictures and videos edited of batter bank and cabinet building. So much to do, so little available time. Bear with me.
admin
Site Admin
Posts: 1
Joined: Fri Feb 16, 2024 4:45 pm

Off-Grid solar panel wiring.

Post by admin »

Sam, we have wired the solar panels per your diagram and we get 50 volts DC. Remember these are not the first panels you used these are the new panel you bought and had to package and send. They have two terminals for + and 2 for - on each panel when we went series we get 48 volts.

I'm ready to intall them but not sure how to wire them.. :?:
admin
Site Admin
Posts: 1
Joined: Fri Feb 16, 2024 4:45 pm

Solar Panel Wiring and Turbine/Charge Controller Voltage

Post by admin »

Wire them like the manual shows. Wire them into the charge controller as shown. You are overanalysing the voltage and seeing maximum. These panels have a nominal voltage of 12v like most solar panels.

This is a picture of me with our upgraded 240 watt large solar panel kit. Our standard kits are built with 150 watts but from time to time I get these upgraded larger panels and sell with home wind turbine kits as a promotion.

Image

When you look at solar panel specifications this is what you see. I noticed in reviewing this that the nominal voltage is not in the label. That should be added for clarity sake. So Here it is.

117 Watt PV Module:WE7-117Wp
Nominal Voltage: 12v DC
Maximum Power - Pmax: 117W
Open Circuit Voltage - Voc: 23.74v DC
Max Power Voltage - Vmp: 18.82v DC
Short Circuit Current - Isc: 7.09 amp
Max Power Current - Imp: 6.31 amp

This is all correct what you are reading. Really good questions, but fear not, the Turbine/Charge Controller has facility to deal with this, as does any charge controller for solar panels. An MPPT (Maximum Power Point Tracking) charge controller resides between the 24v DC battery load and the solar panels. The MPPT regulates the voltage for the panels which allows them to operate at their peak power when conditions allow.

Image

Like I replied in my email, after dark the panels will read 2v DC or so, and the performance varies with the solar resources of the day. This is all normal and panel voltage output swings all over the place. The 12v Nominal is the average specification for system config. and is not a direct output spec.

The Turbine/Charge Controller is a hybrid device which has the required facility to support solar and wind charging. This Turbine/Charge Controller basically takes the varying voltage and amps input from your 117 watt solar panels and converts it into a constant 24v DC voltage or current, to optimize charging the 24 volt battery bank. The controller is a Maximum power point tracking (MPPT) type, which charges faster as more sun is available, rather than at a set rate as most controllers do. This is all good and makes our home wind turbine systems more efficient than others.


Related Article Post:
About Turbine/Charge Controller Status Lights?


Twin Turbine Rooftop Wind Turbines, Michigan
Illinois One Turbine Wind/Solar Hybrid With Tower
Oklahoma Install, One Turbine Wind Only Rooftop Wind Turbine
Small Wind Turbine Kit, Installed in Oklahoma
Rooftop Wind Turbine Kit Install, Indiana
.
--
turbineZ
admin
Site Admin
Posts: 1
Joined: Fri Feb 16, 2024 4:45 pm

Post by admin »

Sam, you're not bad lookin guy. Haven't missed any meals lately but that's not bad I haven't either lolololololo

Thanks for the assurance, I'm complete now will have the panels up soon. I have a frig, and a lot of lights, 4 circuits on now.
admin
Site Admin
Posts: 1
Joined: Fri Feb 16, 2024 4:45 pm

Post by admin »

Sam, I hooked them up and it is working great. Green & Red lights flash, the Red is more vivid but we are a little short on wind but have good sun.

Thanks
admin
Site Admin
Posts: 1
Joined: Fri Feb 16, 2024 4:45 pm

Post by admin »

Sam, I started in Jan. 09 with my skystream at 6.9 cents and every Month it increased as we generated more power now we are at 9 cents per kwh.
Post Reply